A code-along is a story about coding in which you are encouraged to “code up” all the examples in the story. In a code-along you should not cut-and-paste.
In this code-along, we will explore how to create an artifact in CanaryMod’s default Minecraft world. We will do this in two stages. In stage 1, we will develop aprototype LEGO artifact that we will view in LDD. LDD provides a relatively quick feedback loop for our development process (i.e., running a Bricklayer program and seeing the results in LDD happens fairly quickly). In addition, LDD is stateless. For example, if we do not like the way an artifact has turned out we can simply change the code in our Bricklayer program and run the program again. In LDD, the old artifact will disappear and the new artifact will appear in its place. This is not true when creating Bricklayer artifacts in Minecraft worlds. We will therefore take advantage of LDD’s rapid feedback loop and stateless nature in order to properly position, polish, and debug our artifact.
Once the prototype (LEGO) artifact is completed we will move to stage 2 of our development process. In this stage, we will do the following.
- Startup a Minecraft server using CanaryMod.
- Startup a Minecraft client.
- Connect the client to the server.
- Modify our Bricklayer program so that it produces a Minecraft artifact.
- Run the Bricklayer program in the traditional manner.
- Enter the Minecraft world and view the results.
Prototypes versus Final Products
In this code-along, the artifact that we create is simple enough that there are no structural differences between the prototype artifact and the final (Minecraft) artifact. However, it should be noted that prototypes are generally simplified versions of final products. In Bricklayer, this simplification shows up in two ways: (1) as a difference in size of the artifact, and (2) as a loss of detail (i.e., information) about the specifics of a Minecraft block.
On the subject of size, LDD is only effective at viewing artifacts having less than 25K pieces (beyond that LDD dramatically slows down and oftentimes hangs). In contrast, Bricklayer can easily create Minecraft artifacts having 250K blocks or more. The upper limit for Minecraft artifacts created by Bricklayer is approximately 450K blocks on a Lenovo laptop (Windows 8.1 (64-bit), Intel Core i7-4710HQ CPU @ 2.50 GHz, 16 GB RAM). The change in artifact size between prototype and final form is best realized through parameterization.
Example. Consider a cube whose side is 10 versus a cube whose side is 50. The first cube can be viewed in LDD while a cube whose side is 50 cannot be viewed in LDD, but can be viewed in Minecraft.
With respect to loss of detail, at the time of this writing, Bricklayer supports 100 LEGO bricks and 343 Minecraft Blocks. This means that Minecraft artifacts can have distinctions that are not visible in LDD. Technically speaking, a LEGO artifact created with Bricklayer can contain at most 100 different kinds of bricks.
Example. Suppose an oak door and and oak plank are both represented as a brown LEGO brick. In this case, the location of oak doors within an oak plank house (which is distinguishable in Minecraft) would not be distinguishable in LDD.
Stage 1 – Use LDD to Create a Prototype Artifact
The artifact created by the program shown below consists of three lines, which intersect at (0,0,0) – the (absolute) origin for Bricklayer. The blue line runs along the x-axis in the positive direction (i.e., from left-to-right). The red line runs along the y-axis in the positive direction (i.e., from bottom-to-top), and the yellow line runs along the z-axis in the positive direction (i.e., from front-to-back).
We have chosen to create this artifact as our first Minecraft artifact because it will help us understand how LDD’s coordinate space relates to Minecraft’s coordinate space.
open Level_4;

val dimensions = 32;

fun artifact (x,y,z) =
    (
        line (x,y,z) (x+16,y   ,z   ) BLUE;
        line (x,y,z) (x   ,y+16,z   ) RED;
        line (x,y,z) (x   ,y   ,z+16) YELLOW
    );

build(dimensions,dimensions,dimensions);

artifact (0,0,0);

show "thing";

Stage 2 – Creating a Bricklayer Artifact in Minecraft
Before runing a Bricklayer program that creates something in Minecraft, we must first start our CanaryMod server and connect to it. This is done as follows.
- On your system, navigate to the folder containing the file StartCanary.bat. If you followed the standard install instructions, this file will reside in a folder called AdventuresInMinecraft.
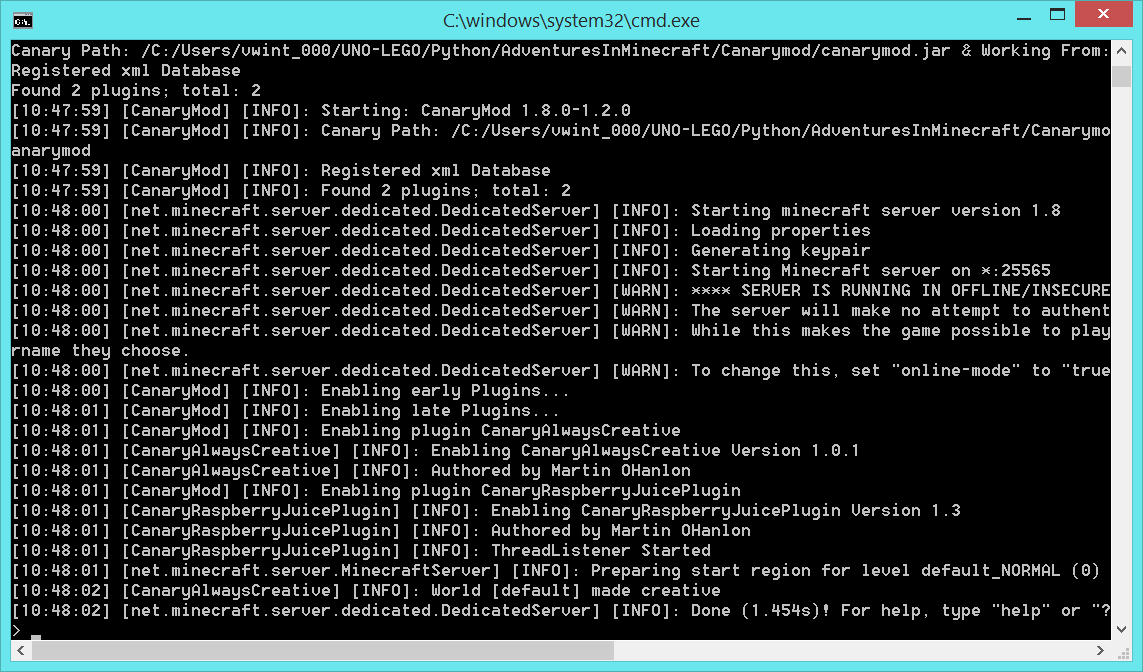
- Launch the CanaryMod server by double-clicking (with the left mouse button) on the file StartCanary.bat. Follow the instructions that appear on the command prompt window (i.e., Press any key to continue …). When the server is up and running you should see something like the following.
- Next, launch Minecraft as you would when playing normally.
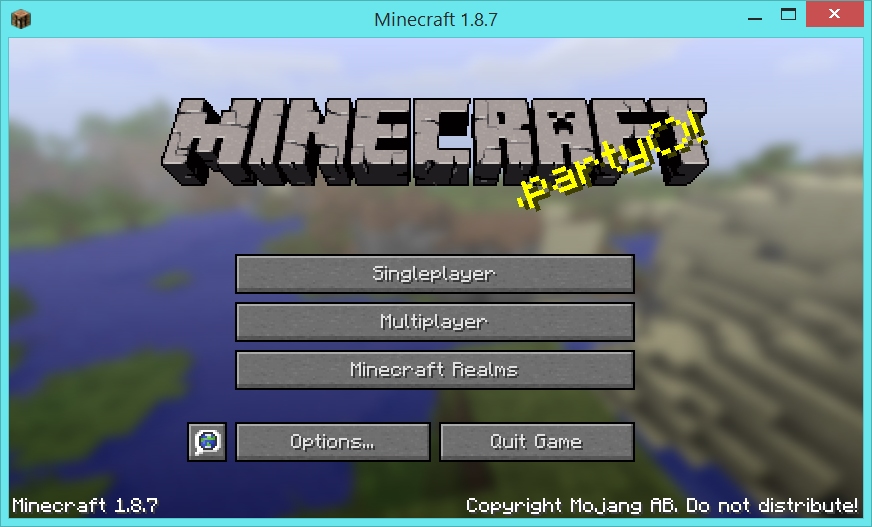
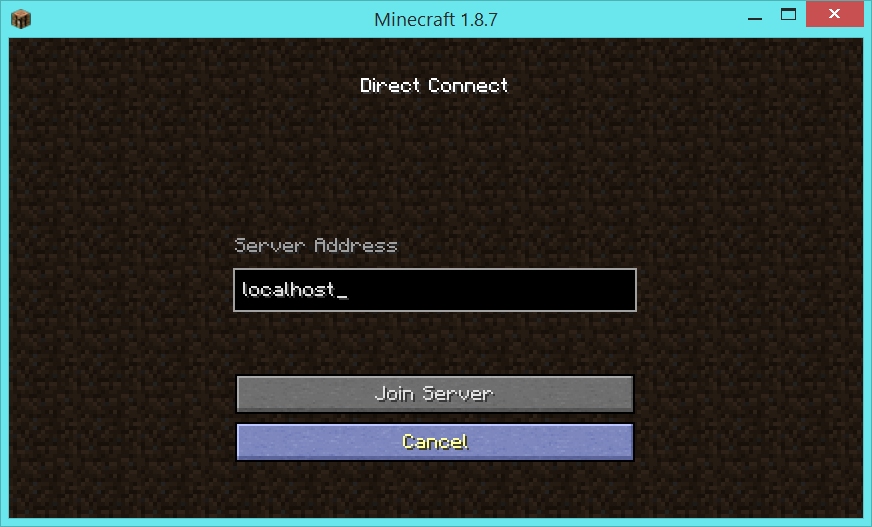
- Select multiplayer mode, and then select direct connect.
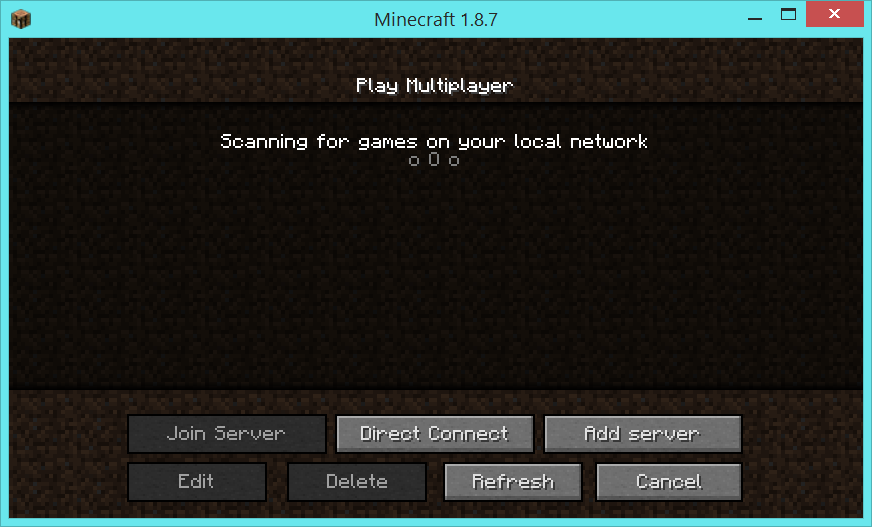
- From the direct connect pane, join the CanaryMod server which is running on your machine. The IP address of this server is localhost.
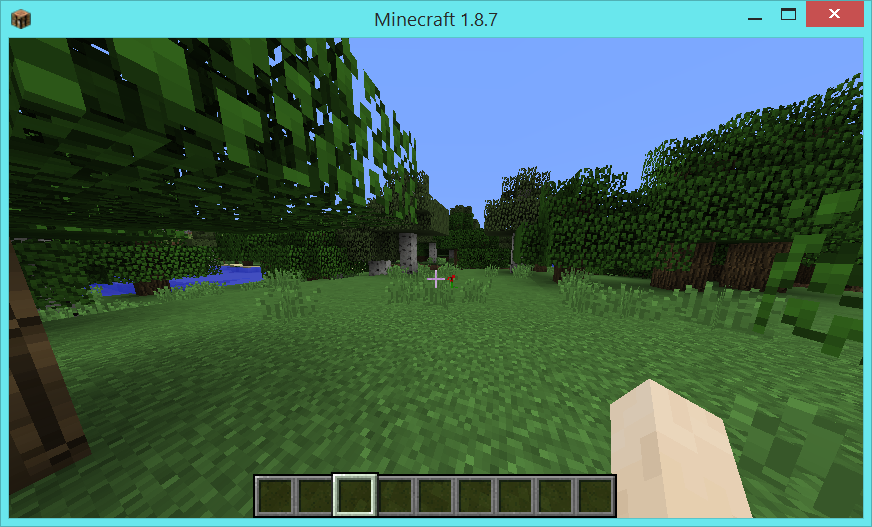
- Assuming all has gone well, you should be in CanaryMod’s default world, and should see something like this.
Minecraft Coordinates
In Minecraft, the position of all blocks are expressed in terms of integer-valued xyz coordinates. In contrast, player’s positions are expressed in terms of real-valued xyz coordinates. Among other things, the following values and ranges are of interest within a Minecraft world.
- lowest position in a world – The bedrock at the bottom of a world has an absolute y-value equal to 0.
- highest position in a world – The highest position at which a block can be placed has an absolute y-value equal to 255.
- sea level – The highest block of sea water has a y-value equal to 62.
- clouds in a world – The clouds in the world have a y-value equal to 127.
- world boundary (previously known as the “Far Lands”) – Coordinates at the world boundary have x and/or z values that are greater than ±30,000,000.
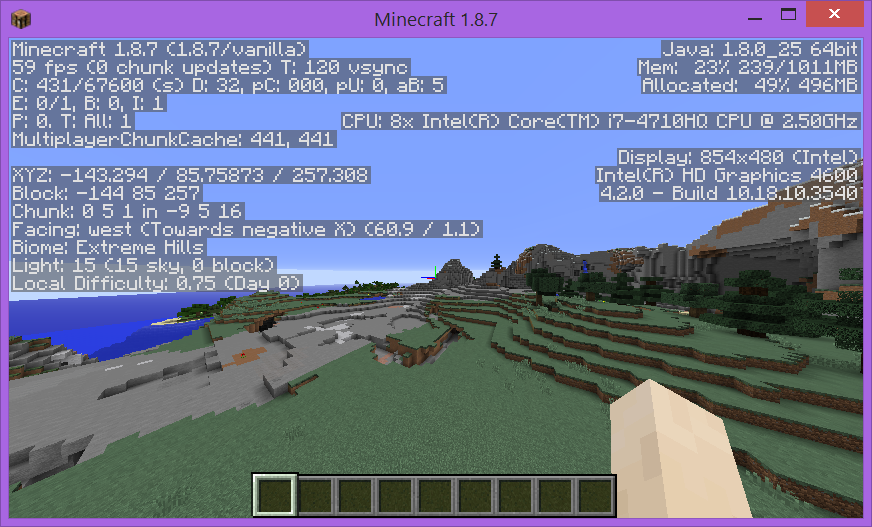
When in a Minecraft world, the function key F3 shows a variety of data, including the player’s absolute XYZ coordinate. In the screenshot below, the player’s coordinate is: XYZ = (-143.294,85,75873,257.308).
A Player’s Spawn Point
In Minecraft, the location where player’s avatar enters a world is called the player’s spawn point. For the purposes of our discussion we will consider a player’s spawn point to be an integer-valued three dimensional coordinate residing in a Minecraft world. (Technically speaking, a player’s position is a real-valued three dimensional coordinate). The exact rules for how a spawn point is calculated are not important to this code-along. What is important is that, behind the scene, Bricklayer uses a player’s spawn point as an offset in order to create a default mapping between Bricklayer coordinates and Minecraft coordinates.
Example. Let (xSpawn,ySpawn,zSpawn) denote an integer-valued three dimensional coordinate corresponding to the player’s spawn point. The following table gives some examples of the default mapping between Bricklayer coordinates and Minecraft coordinates.
| Integer form of Player Spawn Point | Bricklayer Coordinate | Minecraft Coordinate |
| (xSpawn,ySpawn,zSpawn) | (0,0,0) | (xSpawn+0,ySpawn+0,zSpawn+0) |
| (xSpawn,ySpawn,zSpawn) | (1,2,3) | (xSpawn+1,ySpawn+2,zSpawn+3) |
| (xSpawn,ySpawn,zSpawn) | (10,12,7) | (xSpawn+10,ySpawn+12,zSpawn+7) |
We now have sufficient background to discuss the program shown below. In order for the Bricklayer program shown in Stage 1 to create (i.e., output) the artifact in our (default) Minecraft world, a few changes will need to be made. First, we will explicitly establish a correspondence between Bricklayer’s origin (i.e., (0,0,0)) and a Minecraft coordinate expressed as an offset from the player’s spawn point. In the program below, function call
establishes the correspondence shown in the following table.
| Player Spawn Point | Offest from Spawn Point | Absolute Minecraft Coordinate |
| (xSpawn,ySpawn,zSpawn) | (0,30,0) | (xSpawn+0,ySpawn+30,zSpawn+0) |
Example. Suppose the player’s spawn point = (40,65,92). The above offset then the function call setBricklayerOrigin (0,30,0); creates the following mapping between absolute Bricklayer coordinates and absolute Minecraft coordinates.
| Absolute Bricklayer Coordinate | Absolute Minecraft Coordinate |
| (0,0,0) | (40+0,65+30+0,92+0) |
| (1,0,0) | (40+1,65+30+0,92+0) |
| (0,1,0) | (40+0,65+30+1,92+0) |
| (0,0,1) | (40+0,65+30+0,92+1) |
Summarizing then, the function call setBricklayerOrigin (0,30,0) let’s us think of the Minecraft coordinate (xSpawn,ySpawn+30,zSpawn) as Bricklayer’s origin in the Minecraft world. If such a function call is not made within a Bricklayer program then, by default, Bricklayer’s origin will correspond to the player’s spawn point – this is equivalent to what would have happened if the function call setBricklayerOrigin (0,0,0) was (explicitly) executed.
The only other modification that needs to be made to the Bricklayer program shown in Stage 1 is the the output function needs to be changed in the following manner.
| Output to LDD | Output to Minecraft |
| show “thing”; | showMC “thing”; |
The modified program is shown below.
open Level_4;

val dimensions = 32;

fun artifact (x,y,z) =
    (
        line (x,y,z) (x+16,y   ,z   ) BLUE;
        line (x,y,z) (x   ,y+16,z   ) RED;
        line (x,y,z) (x   ,y   ,z+16) YELLOW
    );

build(dimensions,dimensions,dimensions);

(* Set Bricklayer's origin to
   (xSpawn,ySpawn+30,zSpawn)
*)
setBricklayerOrigin (0,30,0);

artifact (0,0,0);

showMC "thing";
(* Output the contents of Bricklayer's virtual
   space to Minecraft. *)
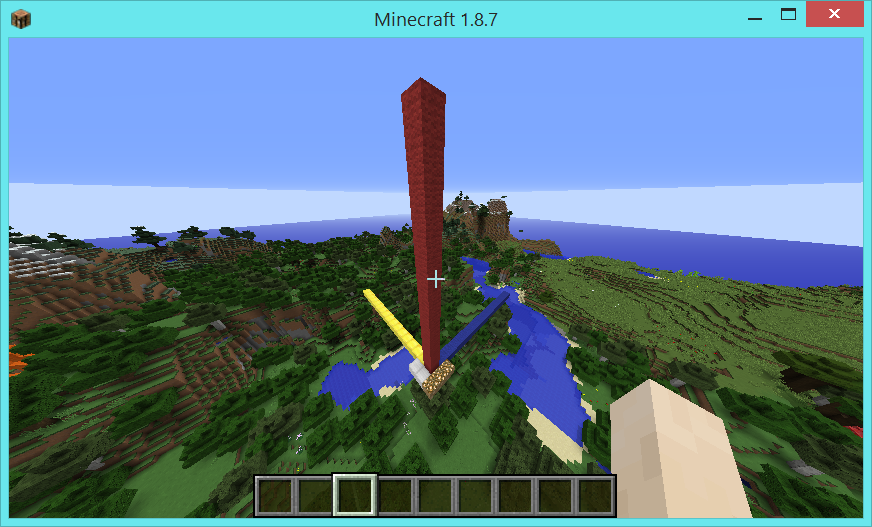
If we execute this program in the usual fashion and then select “Back to Game” in our Minecraft client we will see the following (possibly after rotating the position of our avatar a bit). Note that, in addition to the artifact developed in Stage 1, some glowstone blocks and some iron blocks have been placed. These blocks are placed (1) to inform the player of the location of Bricklayer’s origin in the Minecraft world, and (2) to help a player orient themselves with respect to the artifact created. For example, suppose a player wants a Bricklayer artifact to be moved more to the “right”. What changes to coordinates need to be made to make this happen?
To assist with such analysis, when creating a Bricklayer artifact in a Minecraft world, Bricklayer does the following:
- Adjacent to Bricklayer’s origin (i.e., (0,0,0)) in the Minecraft world, Bricklayer will place three Glowstone blocks running along the x-axis. Specifically, Glowstone blocks will be placed at coordinates (~1,0,~1), (0,0,~1), and (1,0,~1).
- Adjacent to Bricklayer’s origin in the Minecraft world, Bricklayer will place two Iron blocks running along the z-axis. Specifically, Iron blocks will be placed at coordinates (~1,0,0) and (~1,0,1).
- Adjacent to Bricklayer’s origin in the Minecraft world, Bricklayer will place the player at (~1,1,~1).
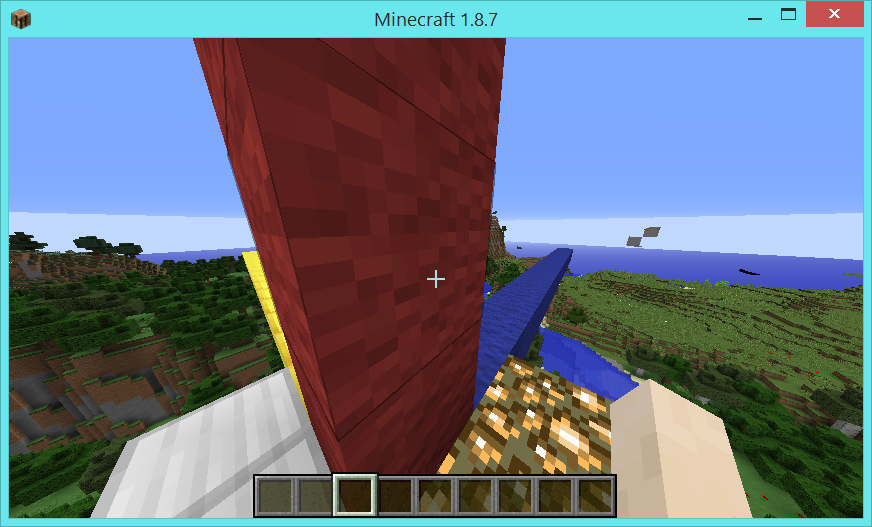
The following screenshot shows, from a distance, the artifact created by the Bricklayer program given in Stage 2 of this code-along. Note that the three glowstone blocks run along Bricklayer’s x-axis in the positive direction and the two iron blocks run along Bricklayer’s z-axis in the positive direction. Also note that these additional blocks lie outside of Bricklayer’s virtual space and therefore do not interfere with (i.e., overwrite) the artifact.
Remarks: If you place yourself on one of the glowstone blocks created by Bricklayer, look in the direction of the blue line, and hit the function key F3 you will see that this direction in Minecraft is “Facing: East (Towards positive X)”. Furthermore, if you look in the direction of the yellow line you will see that this direction in Minecraft is “Facing: North (Towards negative Z)”. Bricklayer compensates for these differences so that the orientation of artifacts in LDD is the same as the orientation of artifacts in Minecraft. Furthermore, increasing the x-value/z-value of an artifact in Bricklayer will move it further along the (blue) x-axis/(yellow) z-axis in the Minecraft world. The Bricklayer function setBricklayerOrigin also compensates accordingly.