Level_3 is a Bricklayer interface (technically speaking an SML structure) that provides a set of functions for “putting” LEGO bricks in the xz-plane. The most important function in Level_3 is a fully parameterized version of a two dimensional “put” function. This function can be used to specify rectangular bricks of any shape (e.g., 4×1) and any type (i.e., any of the brick types supported by Bricklayer). Another important function in Level_3 is the lineXZ function which enables the drawing of “smooth” lines between any two coordinates.
See Vitruvia Concepts 14-18 for exercises relating to Level_3 functions.
To get (direct) access to all the functions in Level_3, place the following command at the beginning of your bricklayer program:
build2D : dimensions2D → unit
See the description of this function given in Level 1
show : string → unit
See the description of this function given in Level 1
showLDD : string → unit
See the description of this function given in Level 1
showLDR : string → unit
When called, this show function will invoke LDraw to view the artifact created by a Bricklayer program. LDraw is able to view larger artifacts than LDD. LDraw can view artifacts containing around 250K pieces.
Also, see the description of this function given in Level 1
showSTL : string → unit
See the description of this function given in Level 1
put2D : dimensions2D → brick_type → point2D → unit
The function put2D is parameterized on (1) the dimensions of a brick, (2) the type of the brick (e.g., RED), and (3) the coordinate of the lower-left corner of the brick. The put2D function is a curried function. What this means is that the arguments to the function need not be passed to the function “all at once”. Curried functions have a special importance in functional programming and can be used in very interesting and powerful ways. However, at this stage (Level 3 programming), we will treat a curried function simply as a function whose paramaters are passed to it using a particular syntax.
Consider the function call shown below.
This function is equivalent to the Level 1 function: put2D_2x4_BLUE (0,0). This example shows how all Level 1 “put2D_” functions can be translated into this new form: First one replaces the underscore symbols with blank symbols. Then one replaces the brick dimension such as 2×4 with a corresponding tuple (2,4).
There are three important things to note about the Level 3 put2D function: First, it can be used to build a brick having any rectangular shape. Second, it can use ANY Bricklayer brick in its construction. See here for a listing of the bricks to chose from. And third, the combination of general bricks and overwriting (see Vitruvia Concept 7) creates interesting possibilities for creating a variety of shapes and artifacts.
lineXZ : point2D → point2D → brick_type → unit
A function that can create a “smooth” line between any two points in the xz-plane is harder than it looks. The problem is that when using 1×1 bricks to draw (short thick) lines, the result is usually a jagged line. The main reason for this is that bricks can only be placed at integer-valued coordinates. For example, a brick can be placed at (0,0) or (1,0), but cannot be placed at (0.5,0). What this means is that, when drawing a line, the ideal placement of a brick must be rounded up or down. It is such rounding that gives lines a jagged appearance.
The function lineXZ can be used to draw “smooth” (i.e., not so jagged) lines in the xz-plane. This curried function accepts three arguments: (1) a starting point in the xz-plane, (2) an ending point in the xz-plane, and (3) a brick type.
The function call shown below will use BLUE 1×1 bricks to draw a line from (0,0) to (5,1).
The line resulting from this call is shown in one of the examples below. You may want to think about how you would use LEGO to create such a line.
setMySpace2D : point2D → dimensions2D → unit
The function setMySpace2D can be used to create a personal sub-space (i.e., technically a sub-plane since we are restricted to two dimensions at this time) within Bricklayer’s virtual xz-plane. Recall that the build2D function creates the virtual xz-plane used by Bricklayer. The input to the setMySpace2D is a xz-coordinate denoting the sub-space origin, and a dimension (e.g., the size of the x-dimension and size of the z-dimension). For example, assuming a virtual xz-plane has (already) been built whose absolute coordinates range from (0,0) to (31,31), the evaluation of the function call:
will create a virtual sub-plane within (0,0),…,(31,31) whose origin (relative to the virtual plane) is at location (5,5), and whose cells (relative to the virtual plane) range from (5,5), …, (14,19). If you “put” a 1×1 brick at sub-space coordinate (0,0) it will be put at the absolute coordinate (5,5).
The sub-space created by setMySpace2D is active for the remainder of the program, or until another setMySpace2D function call is encountered. Also note that one cannot create a sub-space within another sub-space, one can only create a sub-space relative to the entire virtual space used by Bricklayer.
Sub-spaces are interesting because they provide a framework in which multiple Bricklayer programs, written by different individuals, can be composed. For example, a virtual space can be partitioned into four sub-spaces and these sub-spaces can be assigned to four programmers. Each programmer can work independently to develop a Bricklayer program within their assigned sub-space. The results can then be (manually) composed and the composite structure(s) can then be viewed.
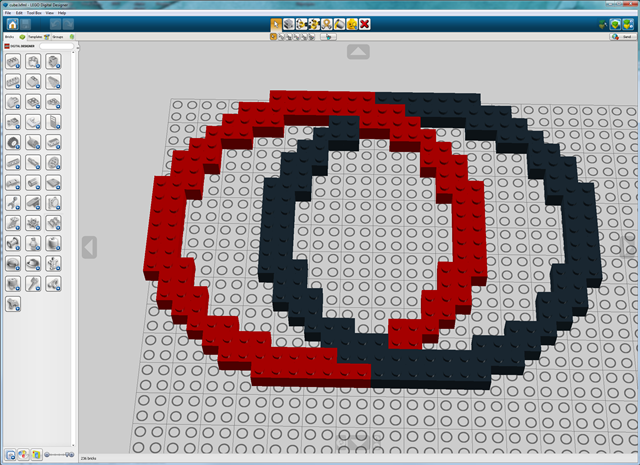
Sub-spaces are “safe” in the sense that one cannot put bricks outside of the currently active sub-space. For example, it is not possible for a student, working in one sub-space, to create code that overwrites (or otherwise interferes with) the structure being developed by a student working in a disjoint sub-space. The only way such interference could occur is the evaluation of setMySpace2D function calls. This notion of safety can be used to advantage for projects requiring cooperation among individuals. For example, interlocking rings (such as those in the Olympic logo) can be created using setMySpace2D (see example below).
showMySpace2D : unit → unit
The function showMySpace2D will display, in the Bricklayer execution window (Windows command prompt window), the absolute coordinates of the origin and upper bounds of the currently active mySpace as well as its size. This information can be useful in a program that contains multiple mySpaces.
circleXZ : radius → brick_type → center → unit
See the description of this function given in Level 2
ringXZ : radius → thickness → brick_type → center → unit
See the description of this function given in Level 2
setOffset2D : point2D → unit
See the description of this function given in Level 2
incOffset2D : point2D → unit
See the description of this function given in Level 2
decOffset2D : point2D → unit
See the description of this function given in Level 2
showOffset2D : unit → unit
See the description of this function given in Level 2
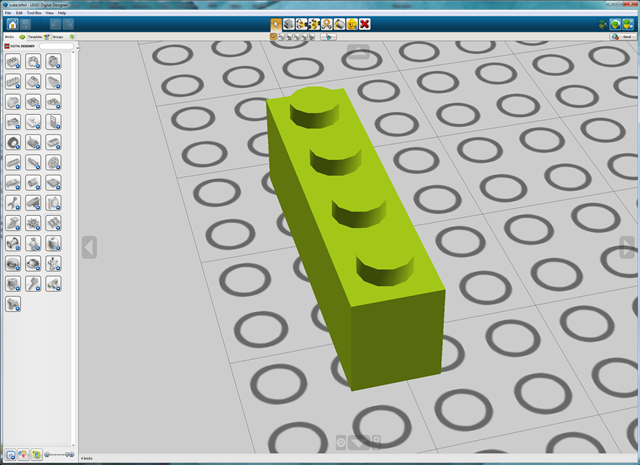
Example 1
open Level_3;

(* (0,0), ..., (20,20) *)
build2D(21,21);

put2D (1,4) LIGHTGREEN (0,0);

showLDD "New Brick Shape and Type";
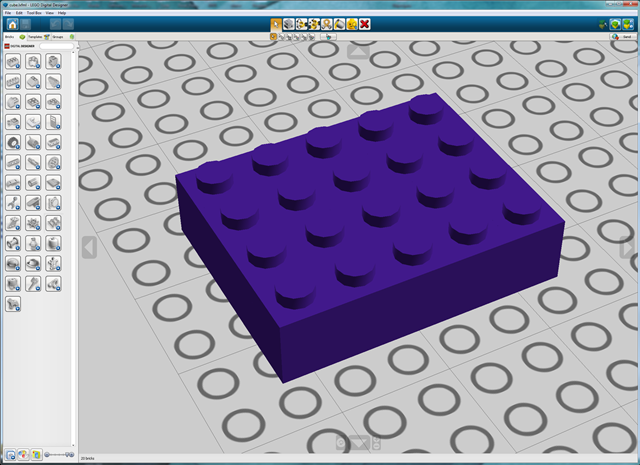
Example 2
open Level_3;

(* (0,0), ..., (20,20) *)
build2D(21,21);

put2D (5,4) VIOLET (0,0);

showLDD "New Brick Shape and Type";
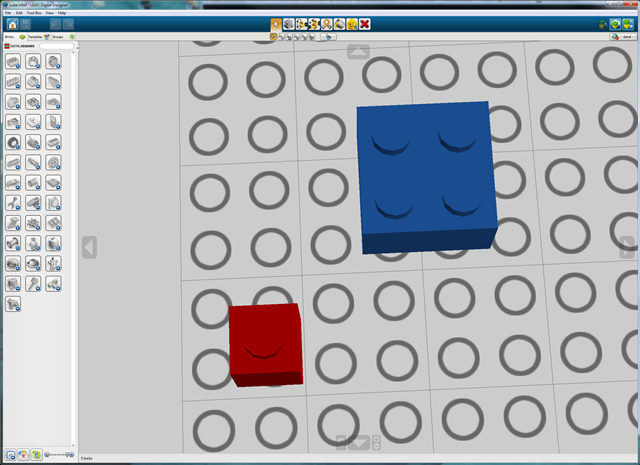
Example 3
open Level_3;

(* (0,0), ..., (20,20) *)
build2D(21,21);

put2D (8,6) RED   (0,0);
put2D (8,1) WHITE (0,3);
put2D (1,6) WHITE (3,0);

showLDD "Bricks and Overwriting";

Example 4
open Level_3;

(* (0,0), ..., (20,20) *)
build2D(21,21);

lineXZ (0,0) (5,1) BLUE;

showLDD "LineXZ";

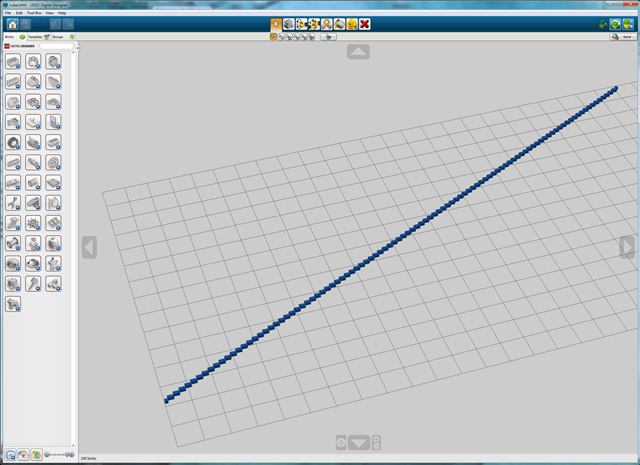
Example 5
open Level_3;

(* (0,0), ..., (199,199) *)
build2D(200,200);

lineXZ (0,0) (200,100) BLUE;

showLDD "The Longer the line, the smoother it appears";
Example 6
open Level_3;

(* (0,0), ..., (20,20) *)
build2D(21,21);

put2D (1,1) RED (0,0); (* default origin *)

(* ----------------------------------------- *)
setMySpace2D (2,2) (10,10);
showMySpace2D ();

put2D (2,2) BLUE (0,0); (* my space origin *)

showLDD "My Space";
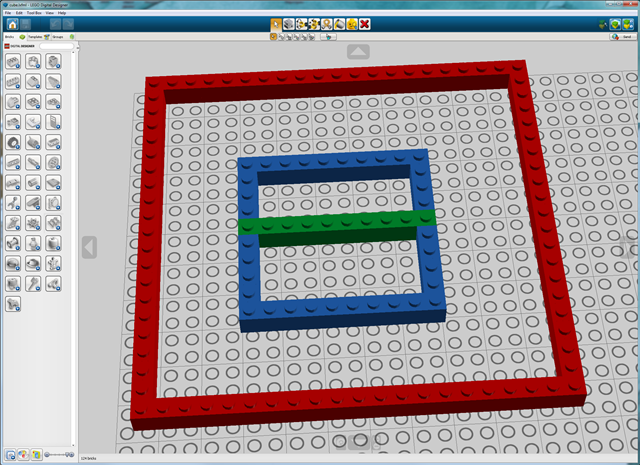
Example 7
open Level_3;

(* (0,0), ..., (20,20) *)
build2D(21,21);

put2D (21,21) RED   (0,0);
put2D (19,19) EMPTY (1,1);

setMySpace2D(5,5) (10,10);
showMySpace2D();
put2D (10,10) BLUE  (0,0);
put2D ( 8, 8) EMPTY (1,1);

(* note that line is clipped *)
lineXZ (0,5) (15,5) GREEN;

showLDD "My Space";
Example 8
open Level_3;

build2D(40,40);

(* ----------------------------------------- *)
setMySpace2D (0,0) (40,20);

ringXZ 10 2 RED   (20,20);
ringXZ 10 2 BLACK (27,20);

(* ----------------------------------------- *)
setMySpace2D (0,20) (40,20);

ringXZ 10 2 BLACK (27,0);
ringXZ 10 2 RED   (20,0);

showLDD "Interlocking Rings";
Example 9
open Level_3;

fun upperB brick (x,z) =
    (
        put2D (3,40) brick (x+2,z);
        put2D (3, 3) brick (x,z+37);
        put2D (3, 4) brick (x,z+18);
        put2D (3, 3) brick (x,z);

        setMySpace2D (4,0) (14,22);
        ringXZ 10 3 brick (3,10);

        setMySpace2D (4,19) (14,22);
        ringXZ 10 3 brick (3,10);

        setMySpace2D (0,0) (20,40);
        put2D (2,1) EMPTY (3,39);
        put2D (2,1) EMPTY (3,0)
    );

build2D(20,40);

upperB BLUE (0,0);

showLDD "upper B";

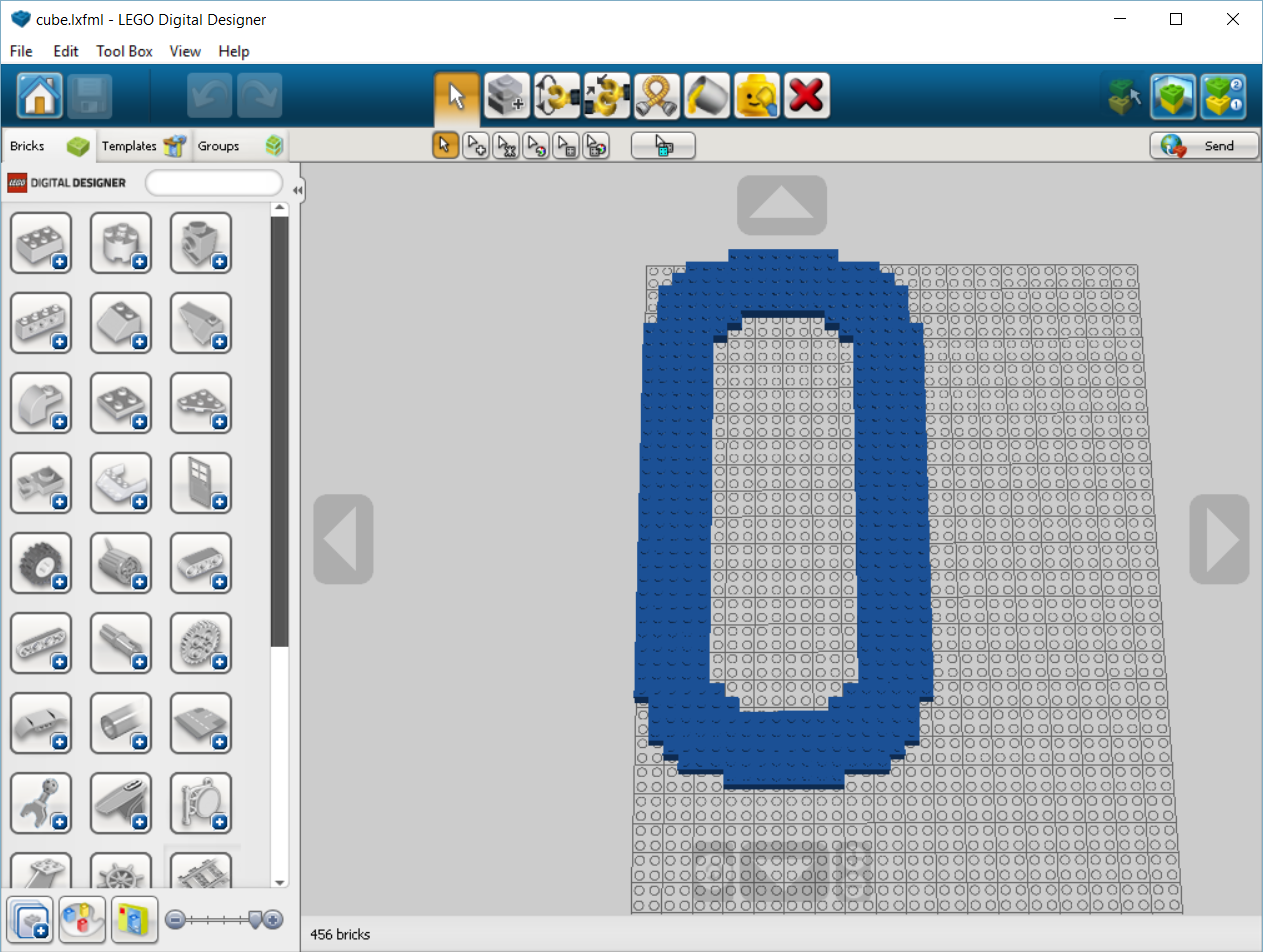
Example 10
open Level_3;

fun smoothLL brick (x,z) =
    (
        put2D (6,1) EMPTY (x,z);
        put2D (1,5) EMPTY (x,z+1);

        put2D (2,1) EMPTY (x+1,z+1);
        put2D (1,1) EMPTY (x+1,z+2)
    )

fun smoothUL brick (x,z) =
    (
        put2D (6,1) EMPTY (x,z+39);
        put2D (1,5) EMPTY (x,z+34);

        put2D (2,1) EMPTY (x+1,z+38);
        put2D (1,1) EMPTY (x+1,z+37)
    )

fun smoothUR brick (x,z) =
    (
        put2D (6,1) EMPTY (x+14,z+39);
        put2D (1,5) EMPTY (x+19,z+34);

        put2D (2,1) EMPTY (x+17,z+38);
        put2D (1,1) EMPTY (x+18,z+37)
    )

fun  smoothLR brick (x,z) =
    (
        put2D (6,1) EMPTY (x+14,z);
        put2D (1,5) EMPTY (x+19,z+1);

        put2D (2,1) EMPTY (x+17,z+1);
        put2D (1,1) EMPTY (x+18,z+2)
    )

fun  smoothInner brick (x,z) =
    (
        put2D (2,1) brick (x+5,z+34);
        put2D (1,1) brick (x+5,z+33);

        put2D (2,1) brick (x+5,z+5);
        put2D (1,1) brick (x+5,z+6);

        put2D (2,1) brick (x+13,z+5);
        put2D (1,1) brick (x+14,z+6);

        put2D (2,1) brick (x+13,z+34);
        put2D (1,1) brick (x+14,z+33)
    );

fun  upperO brick (x,z) =
    (
        put2D (5,40) brick (x,z);
        put2D (5,40) brick (x+15,z);

        put2D (20,5) brick (x,z);
        put2D (20,5) brick (x,z+35);

        smoothInner brick (x,z);
        smoothLL brick (x,z);
        smoothUL brick (x,z);
        smoothUR brick (x,z);
        smoothLR brick (x,z)
    );

build2D(20,40);

upperO BLUE (0,0);

showLDD "upper O";