Code Along
 A code-along is a story about coding in which you are encouraged to “code up” all the examples in the story. In a code-along you should not cut-and-paste.
In this code along, we will explore how to use Bricklayer’s setMySpace2D function to create interlocking rings.
The setMySpace2D function
The function setMySpace2D can be used to create a “private” subspace within the virtual space created by the build2D function. The setMySpace2D function takes as its input a point (x,z) and a build size (sizeX,sizeZ). Conceptually speaking, the (sizeX,sizeZ) parameter in a setMySpace2D function call plays the same role as this parameter would play in a build2D function call. Specifically, both will make a virtual space available whose size is (sizeX,sizeZ), with coodinates in the range (0,0) … (sizeX-1,sizeZ-1).
The setMySpace2D function can be called as follows.
setMySpace2D (x,z) (sizeX,sizeZ);
After the execution of the the setMySpace2D function call shown above, the placement of bricks will only be permitted at coordinates that fall within the range (x,z) … (x+sizeX-1,z+sizeZ-1). Furthermore, after execution, the point (x,z) will be treated as the origin. This will remain in effect until either (1) the end of the program is reached, or (2) another setMySpace2D function call is made.
Definition: We say a setMySpace2D function call mirrors a build2D function call if and only if (1) the point parameter of the setMySpace2D function call is (0,0), and (2) the size of parameter of setMySpace2D function call is identical to the (size) parameter of the build2D function call.
Within a Bricklayer program, the effects of a setMySpace2D function call can be erased through a setMySpace2D function call that mirrors the build2D function call used in the program. The following code fragment shows how this can be done.
⋮
build2D (64,64); (* the build2D function call for this program *)
⋮
setMySpace2D … ;
⋮
setMySpace (0,0) (64,64); (* mirror of build2D *)
⋮
Example 1 – setOffset2D
This example shows how setOffset2D can be used to shift the origin to the coordinate (20,20). Before the call to setOffset2D, eight lineXZ function calls are used to create a blue square and a yellow square. The blue square and the yellow square intersect at the point (20,20). Next, the setOffset2D function is used to shift the origin to the point (20,20). This is followed by a function call that creates a ring whose center is (0,0). Note that the function call
ringXZ 10 2 RED (0,0);
creates an entire ring. Specifically, bricks are placed at coordinates that contain negative values relative to the shifted origin. This ability to place bricks at negative coordinates is further demonstrated by two put2D function calls that place red 1×1 bricks at the coordinates (~20,0) and (0,~20) respectively.
open Level_3;

build2D(64,64);

lineXZ ( 0, 0) ( 0,20) BLUE;
lineXZ ( 0,20) (20,20) BLUE;
lineXZ (20,20) (20, 0) BLUE;
lineXZ (20, 0) ( 0, 0) BLUE;

lineXZ (20,20) (20,40) YELLOW;
lineXZ (20,40) (40,40) YELLOW;
lineXZ (40,40) (40,20) YELLOW;
lineXZ (40,20) (20,20) YELLOW;

setOffset2D (20,20);

ringXZ 10 2 RED (0,0);

put2D (1,1) RED (~20, 0);
put2D (1,1) RED ( 0,~20);

show2D "Ring";
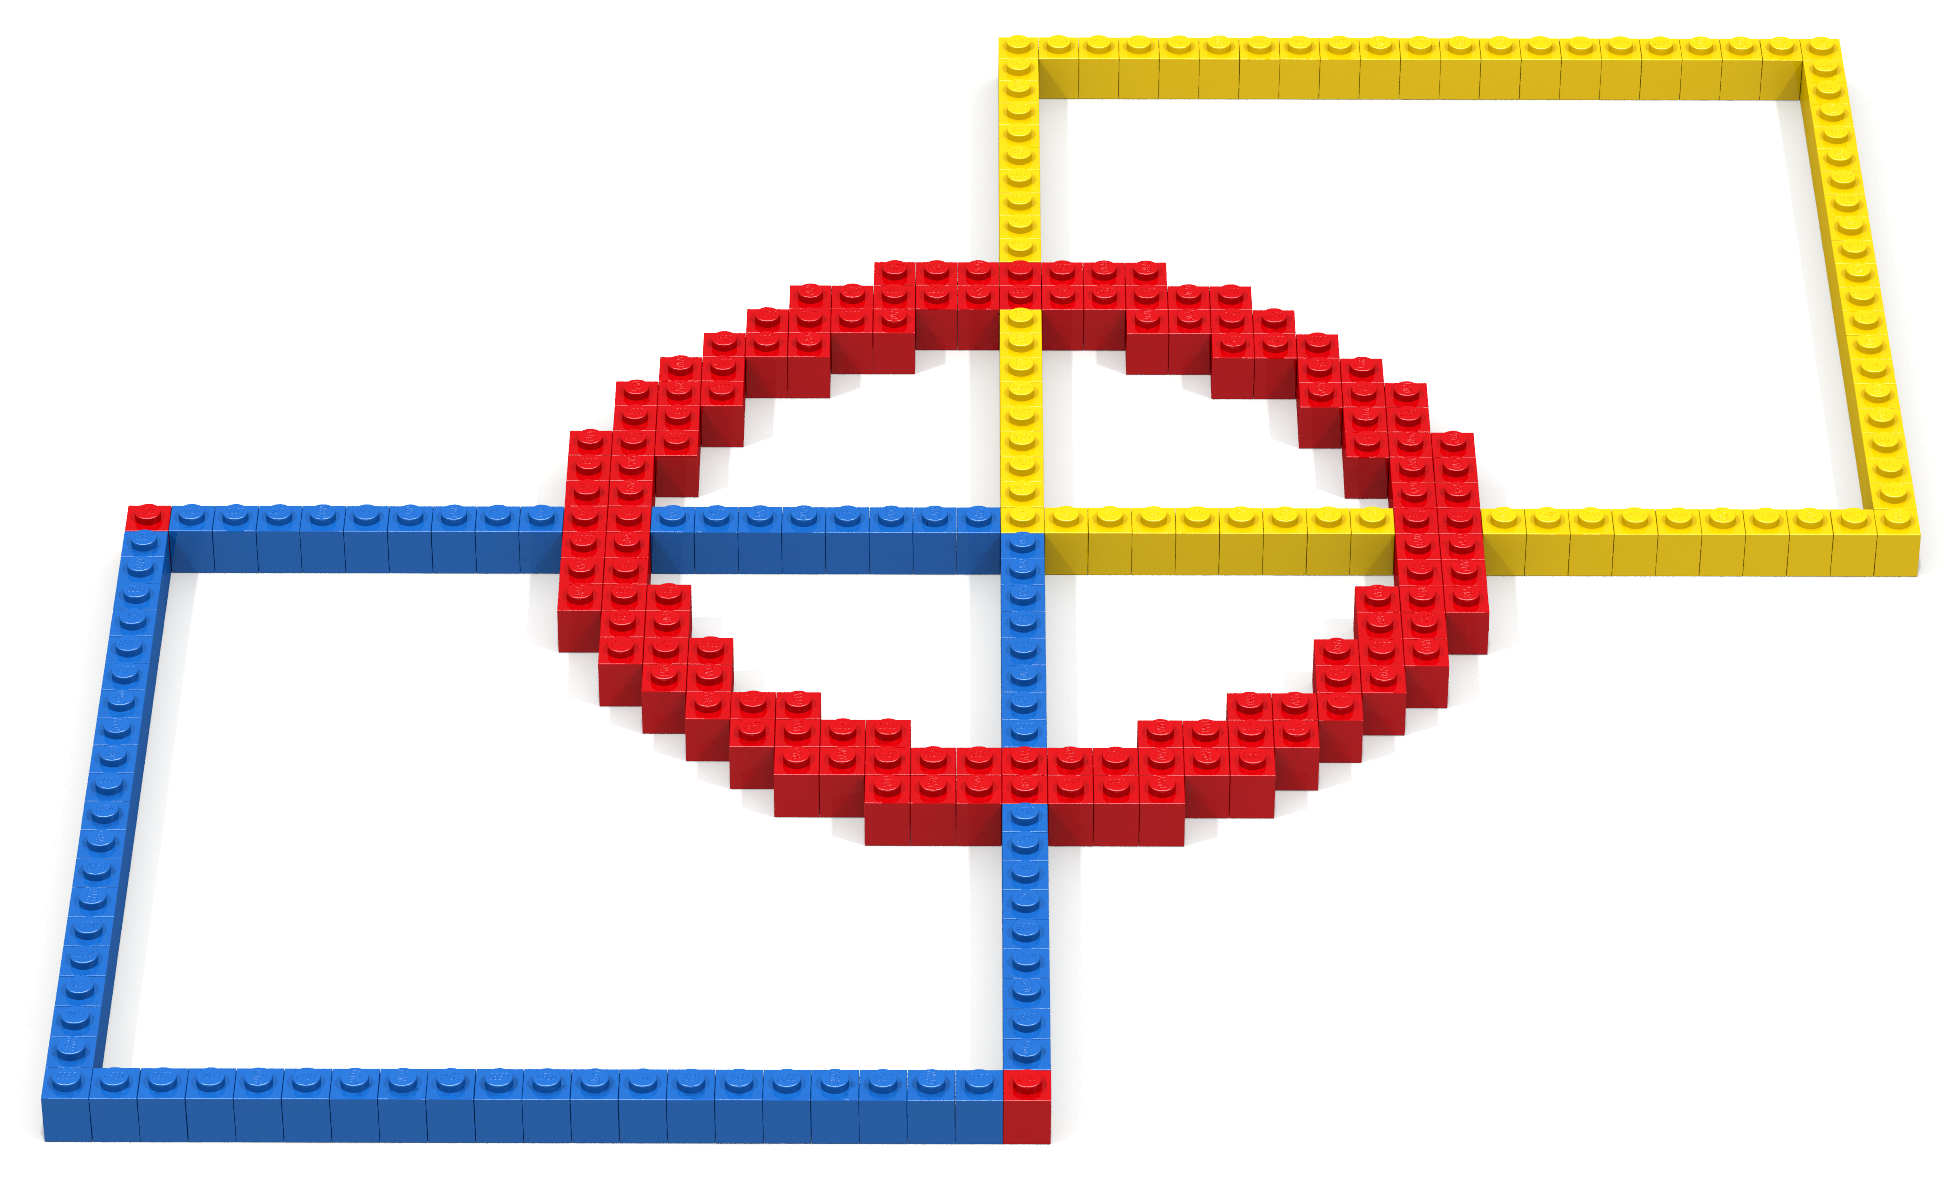
Example 1 – setMySpace2D
This code example is similar to the previous example. The primary difference is that the call to the function setOffset2D is replaced by a call to the function setMySpace2D. In particular, the function call
setMySpace2D (20,20) (40,40);
shifts the origin from (0,0) to (20,20). Furthermore, this setMySpace2D function call only permits bricks to be placed in cells whose coordinates fall in the range (20,20) … (40,40). Because of this restriction, a function call that attempts to create a ring whose center is at the (shifted) origin will only create that porition of the ring whose coordinates all in the range (20,20) … (40,40). In other words, only a quarter of the ring will be created.
The ringXZ function call is followed by two put2D function calls that place 1×1 red bricks at the coordinates (0,0) and (20,20) in the shifted coordinate space. Note than in terms of absolute coordinates (0,0) equals (20,20), and (20,20) equals (40,40). These two put functions demonstrate the lower/upper limits where bricks can be placed.
open Level_3;

build2D(64,64);

lineXZ ( 0, 0) ( 0,20) BLUE;
lineXZ ( 0,20) (20,20) BLUE;
lineXZ (20,20) (20, 0) BLUE;
lineXZ (20, 0) ( 0, 0) BLUE;

lineXZ (20,20) (20,40) YELLOW;
lineXZ (20,40) (40,40) YELLOW;
lineXZ (40,40) (40,20) YELLOW;
lineXZ (40,20) (20,20) YELLOW;

setMySpace2D (20,20) (21,21);

ringXZ 10 2 RED (0,0);

put2D (1,1) RED (0,0);
put2D (1,1) RED (20,20);

show2D "Quarter Ring";
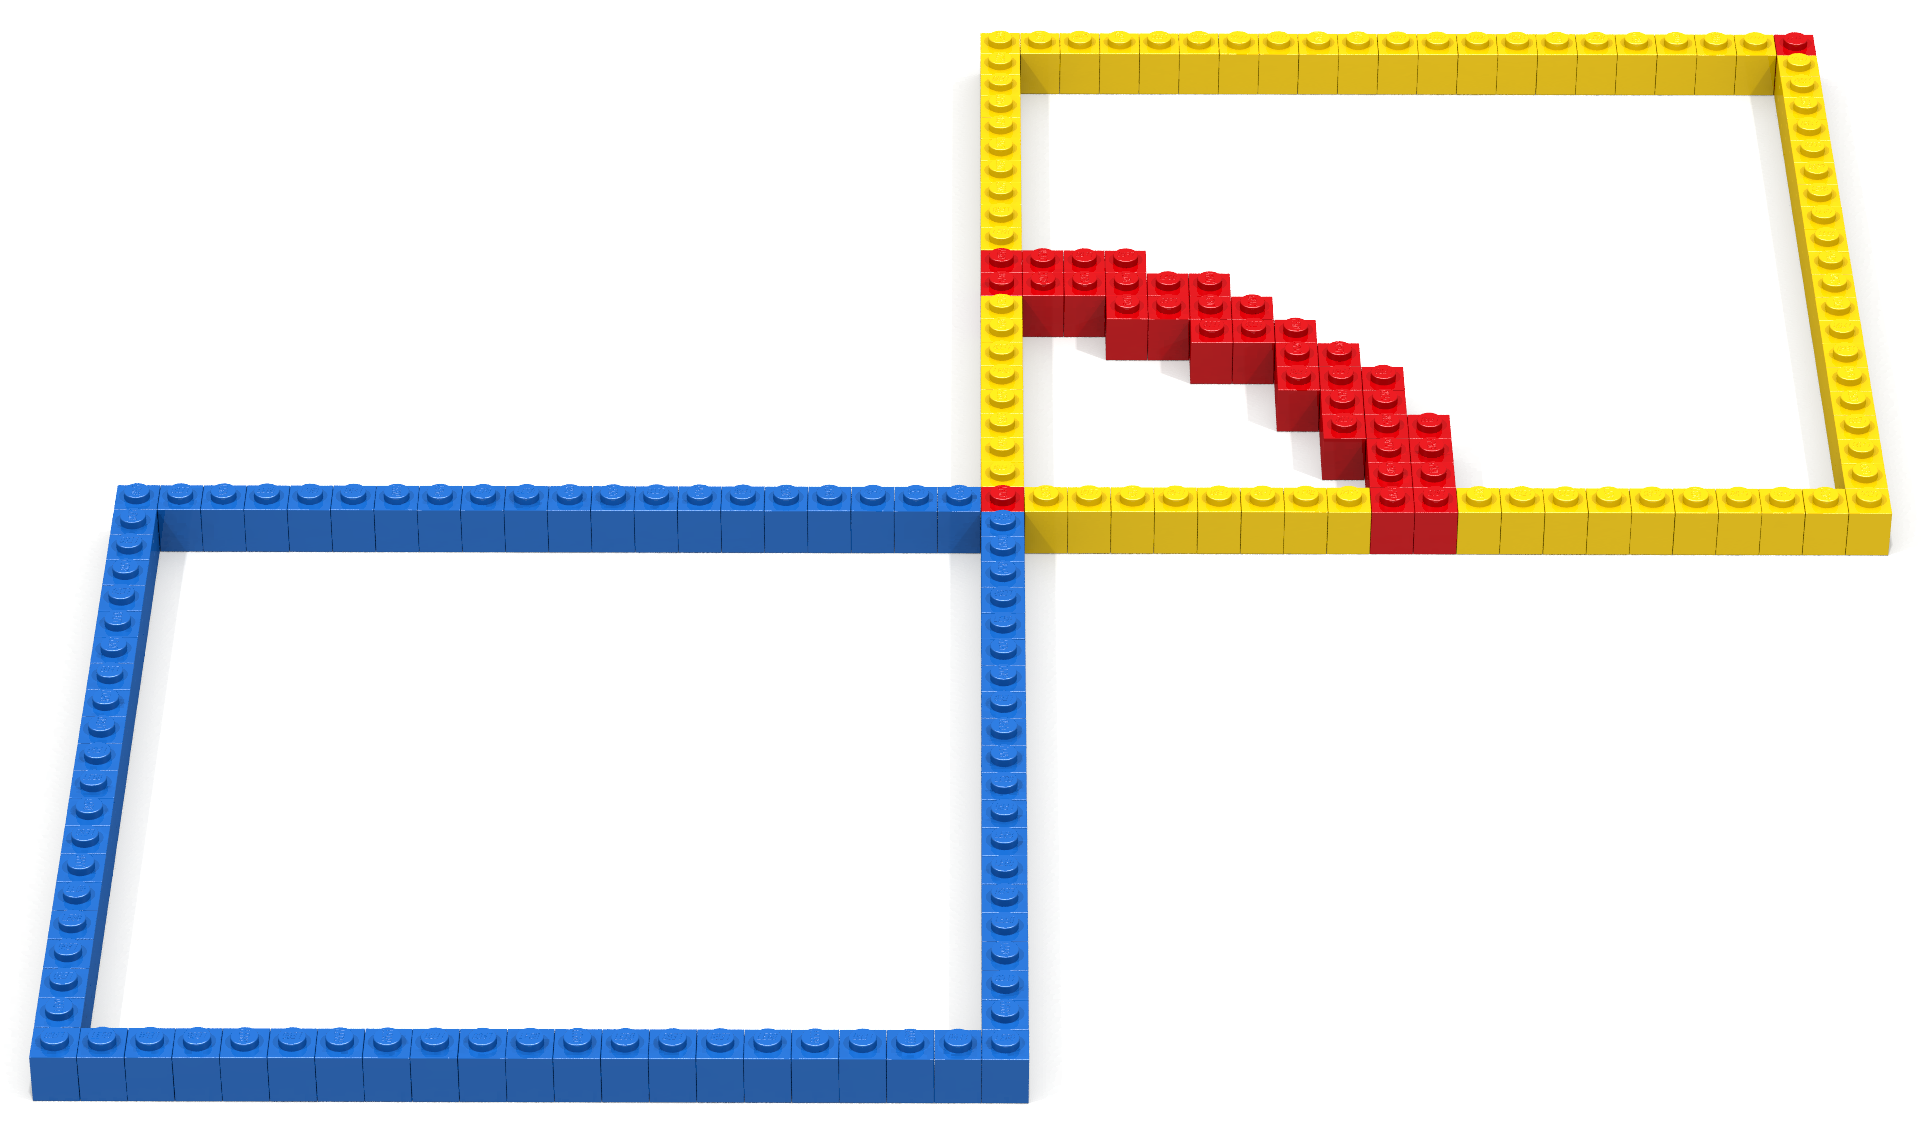
Example – Interlocking Rings
In this example we show how the setMySpace2D can be used to create two spaces. The first space contains cells whose coordinates fall in the range (0,0) … (40-1,20-1). In this space, ringXZ function calls are used to create two overlapping half rings – one red and the other black. Because the black half-ring created after the red half-ring, it overlaps the red half-ring.
The second space contains cells whose coordinates fall in the range (0,20) … (40-1,20-1). In this space, ringXZ function calls are used to create two overlapping half rings – one red and the other black. Because the black half-ring created after the red half-ring, it overlaps the red half-ring.
open Level_3;

build2D (40,40);

(* ----------------------------------------- *)
setMySpace2D (0,0) (40,20);

ringXZ 10 2 RED   (20,20);
ringXZ 10 2 BLACK (27,20);

(* ----------------------------------------- *)
setMySpace2D (0,20) (40,20);

ringXZ 10 2 BLACK (27,0);
ringXZ 10 2 RED   (20,0);

show2D "interlocking rings";